Article Outline: Building Your Own Built-In Wardrobes
I. Introduction
* 1.1 Why Build Your Own Built-Ins? (Cost savings, customization, satisfaction)
* 1.2 What You’ll Need: A Planning Phase (Tools, materials list, measuring, design)
II. Design & Planning
* 2.1 Measuring Your Space Precisely (Importance of accuracy, techniques for measuring)
* 2.2 Choosing the Right Materials (Wood types, hardware, finishes, considering durability and aesthetics)
* 2.3 Sketching Your Design (Simple sketches vs. detailed blueprints, incorporating features)
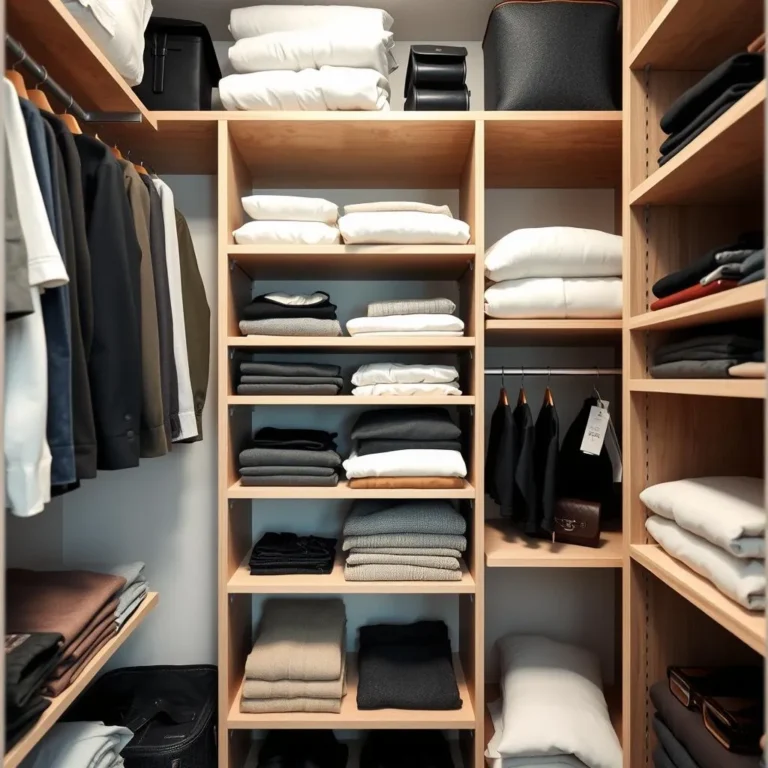
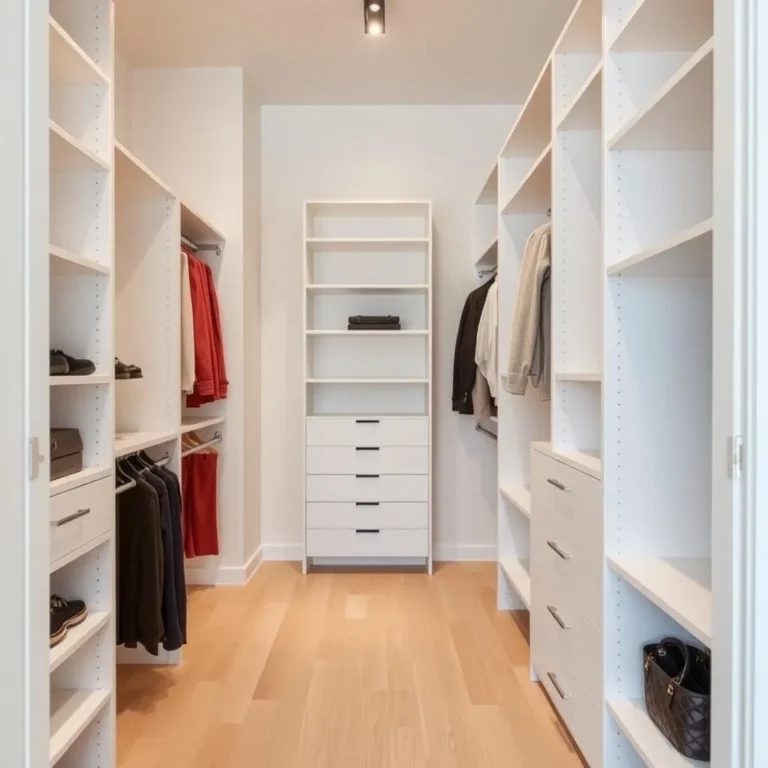
* 2.4 Considering Internal Organization (Shelves, drawers, hanging rods, specialized storage)
III. Construction Process
* 3.1 Building the Carcase (Framing techniques, joining methods, ensuring squareness)
* 3.2 Installing Shelves & Drawers (Drawer slides, shelf supports, adjusting for perfect fit)
* 3.3 Hanging Rods & Accessories (Placement strategies, hardware selection, considerations for weight)
* 3.4 Finishing Touches (Painting, staining, sealing, adding decorative elements)
IV. Installation & Finishing
* 4.1 Securing the Wardrobe (Wall mounting, bracing, ensuring stability)
* 4.2 Adding the Finishing Touches (Door installation, handles, internal organization)
* 4.3 Cleaning Up & Final Inspection (Removing debris, checking for functionality)
V. Conclusion
* 5.1 Celebrating Your Achievement
* 5.2 Further Improvements & Upgrades
VI. FAQs
Building Your Own Built-In Wardrobes: A DIY Guide to Custom Storage
1.1 Why Build Your Own Built-Ins?
Let’s face it: ready-made wardrobes are often a one-size-fits-all solution that rarely fits your space or style perfectly. Building your own built-in wardrobe, on the other hand, offers unparalleled customization, significant cost savings, and a deep sense of accomplishment. Think of it as a bespoke solution tailored precisely to your needs and desires. It’s a project that transforms a bland space into a highly functional and stylish storage haven. Want a specific type of wood? A unique color? Extra-deep drawers? With a DIY built-in, you’re in complete control.
1.2 What You’ll Need: A Planning Phase
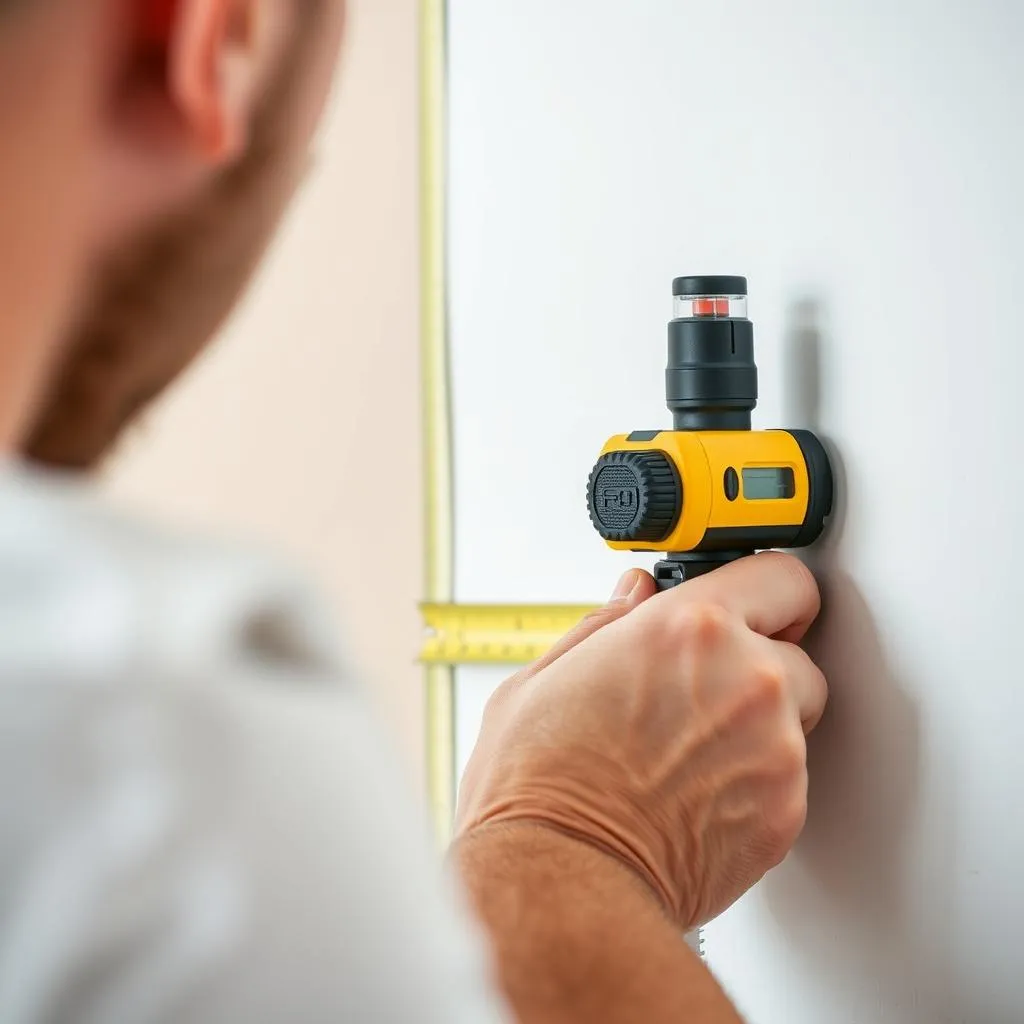
Before you even think about touching a saw, meticulous planning is crucial. This involves gathering the necessary tools—from measuring tape and levels to saws, drills, and possibly a nail gun—and compiling a detailed materials list. Accurate measurements are paramount. Even a slight inaccuracy can throw off the entire project. Don’t rush this step! Get a notepad, pencil, and perhaps some graph paper to sketch out your ideal wardrobe design. Consider what you’ll store inside – dresses, shirts, shoes, bulky winter coats? This informs your internal layout.
2.1 Measuring Your Space Precisely
Measuring accurately is non-negotiable. Use a high-quality measuring tape and double, even triple check your measurements. Consider the wall’s inconsistencies; walls aren’t always perfectly straight. Note any obstructions like pipes or electrical outlets. Take measurements from multiple points to get an accurate average.
2.2 Choosing the Right Materials
The materials you choose drastically affect both the aesthetic and longevity of your wardrobe. Consider the type of wood: solid hardwood is durable but pricier, while engineered wood offers a more budget-friendly option. Explore various finishes – paint, stain, veneer – to achieve your desired look. Think about the hardware: sturdy drawer slides, robust hinges, and stylish handles all contribute to the overall quality and functionality.
2.3 Sketching Your Design
Don’t feel pressured to create architectural blueprints! A simple sketch showing the overall dimensions, shelf placement, and drawer configuration is usually sufficient. Start with a rough outline, then gradually refine it until you have a design you’re confident in. You can even use online design tools to create a visual representation of your project.
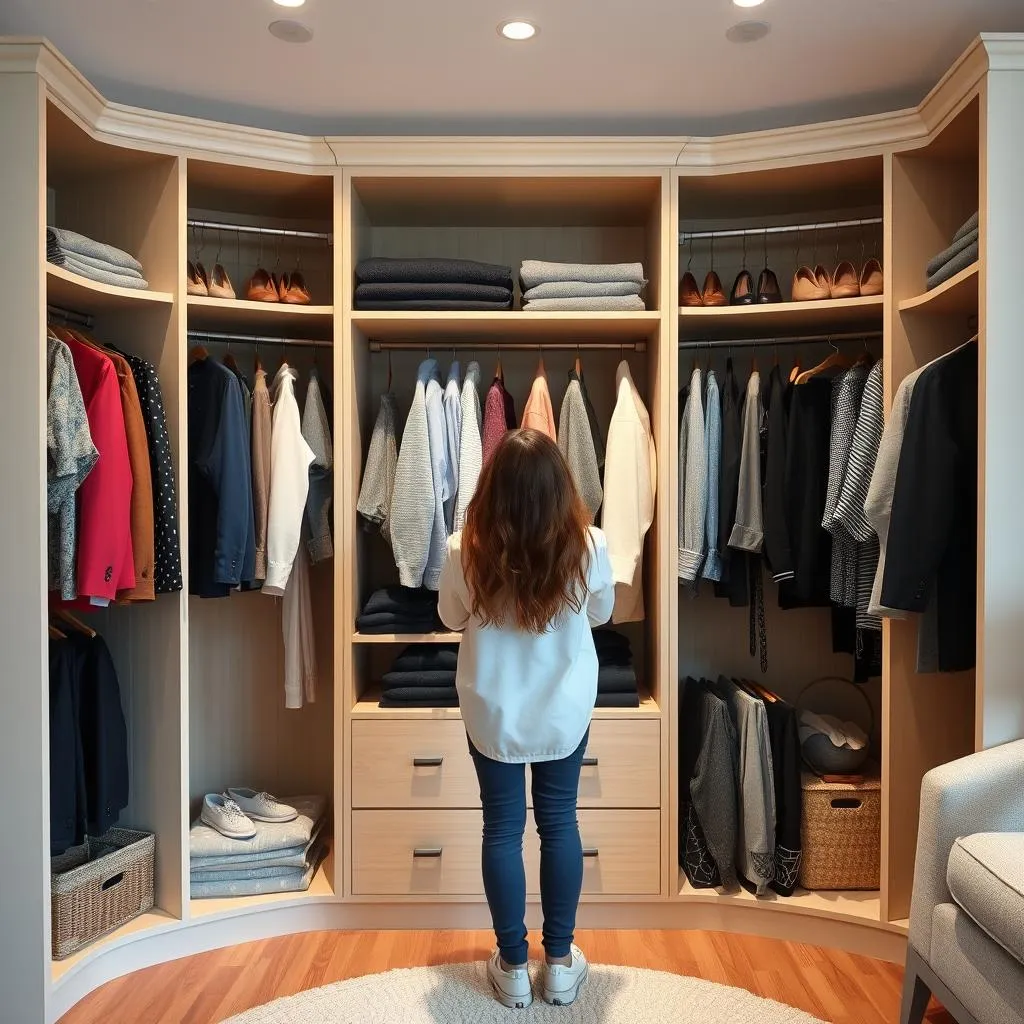
2.4 Considering Internal Organization
This is where your wardrobe truly shines. Plan for a variety of storage solutions: adjustable shelves for flexibility, deep drawers for bulky items, and hanging rods for clothes. Think about specialized storage like pull-out shoe racks or tie racks. Consider the items you store most frequently and design the layout accordingly.
3.1 Building the Carcase
The carcase is the foundation of your wardrobe. This involves creating the frame using carefully cut and joined wood pieces. Accuracy is paramount here. Use strong joinery techniques—like dowels, pocket holes, or biscuits—to ensure a robust and stable structure. Keep checking for squareness throughout the process to avoid any misalignments.
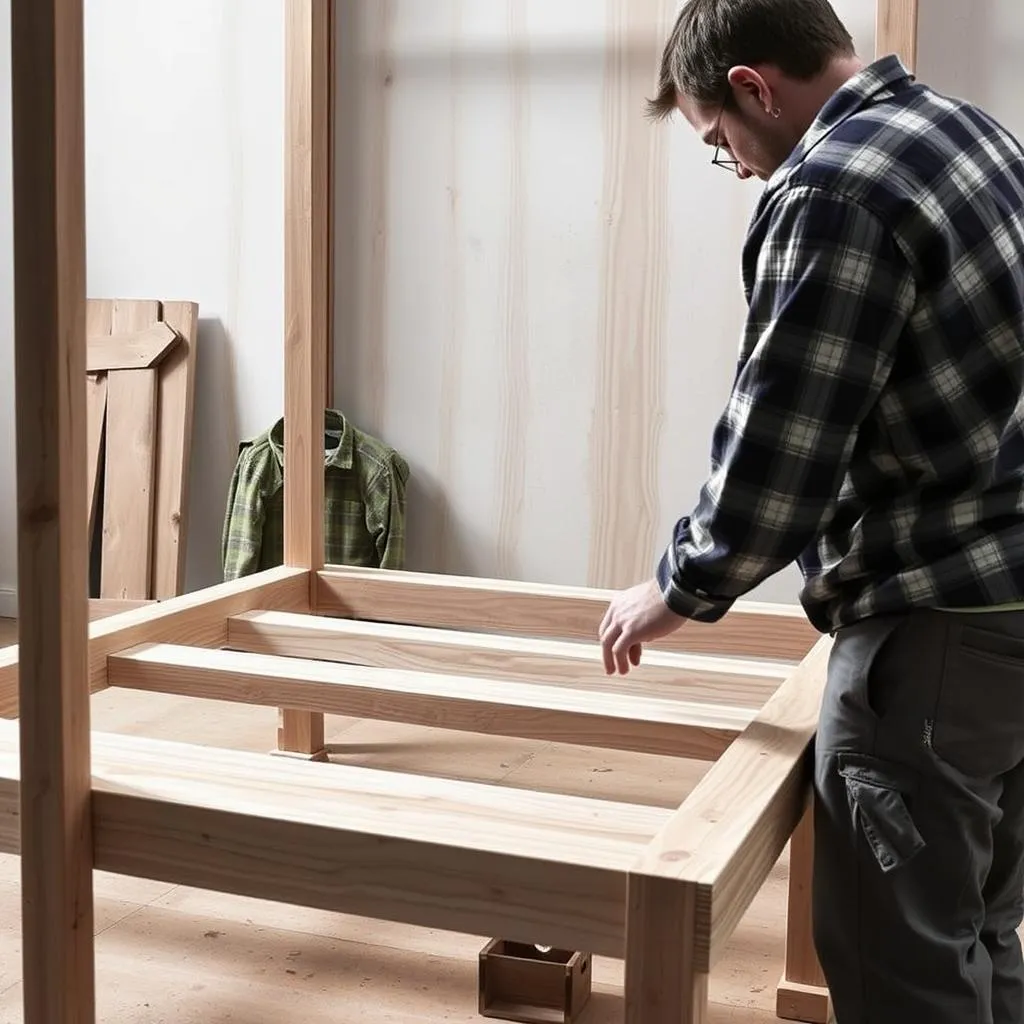
3.2 Installing Shelves & Drawers
Once the carcase is complete, you can install shelves and drawers. Use high-quality drawer slides for smooth operation and consider adding shelf supports for stability. Precise measurements are key; adjust the shelf and drawer positions to perfection.
3.3 Hanging Rods & Accessories
Hanging rods provide a space for hanging clothes. Consider the length and placement of these rods to maximize space efficiency. Choose sturdy hardware and ensure they’re securely fixed to the carcase. Don’t forget the small details: add hooks, tie racks or other accessories to further customize your space.
3.4 Finishing Touches
This is where your wardrobe truly comes to life. Once everything is assembled, it’s time to add those finishing touches. This could involve painting, staining, or sealing the wood to protect it from moisture and wear. Adding decorative elements like crown molding or subtle trim can enhance the overall aesthetics.
4.1 Securing the Wardrobe
Before installing the doors, ensure the wardrobe is securely anchored to the wall studs. This is crucial for stability and safety. Use appropriate wall anchors and bracing to prevent the wardrobe from tipping or shifting.

4.2 Adding the Finishing Touches
Now comes the satisfying part: installing the doors and handles. Choose doors that complement your style—sliding doors, hinged doors, or even bi-fold doors. The handles should be functional and aesthetically pleasing. Add any final internal organization elements like baskets or dividers.
4.3 Cleaning Up & Final Inspection
Finally, clean up all the sawdust and debris, and give your new wardrobe a thorough inspection. Check the functionality of the drawers, doors, and shelves. Make any necessary adjustments.
5.1 Celebrating Your Achievement
Congratulations! You’ve successfully built your own custom built-in wardrobe. Take a moment to appreciate your hard work and the transformation you’ve accomplished in your space. This new storage solution not only provides organization but also adds to the aesthetic appeal of your room.
5.2 Further Improvements & Upgrades
Your built-in wardrobe isn’t set in stone! It is easily adaptable. You can always add new features, shelves, or accessories as your needs change over time. This is the beauty of a DIY project—the potential for ongoing adjustments and enhancements.
Conclusion
Building your own built-in wardrobes is a rewarding experience that combines planning, craftsmanship, and personalization. It’s a project that allows you to design a solution that seamlessly integrates with your space and reflects your personal style. While the process might seem daunting initially, the end result is a truly unique and functional storage solution that elevates your home.
FAQs
-
What tools do I absolutely need? A measuring tape, level, saw (circular or miter), drill, screwdriver, and possibly a nail gun are essential. The specific tools will depend on your design and materials.
-
How much does it cost to build a built-in wardrobe? The cost varies widely based on materials and complexity but is typically significantly less than buying a comparable pre-made unit.
-
Can I build a built-in wardrobe without prior experience? Absolutely! With careful planning and a willingness to learn, even beginners can successfully complete this project. There are numerous online resources and tutorials to guide you.
-
What if I make a mistake? Don’t worry! Mistakes are part of the learning process. With some careful planning and maybe some wood filler, most mistakes are easily corrected.
-
How long does it take to build a built-in wardrobe? This depends on the size and complexity of the project, but plan for several days to a couple of weeks, working in manageable chunks of time.