Outline: Pantry Organization System
I. Introduction:
* 1.1 The Chaos of a Cluttered Pantry: (H2)
* 1.1.1 The frustration of searching for items. (H3)
* 1.1.2 Expired food and wasted money. (H3)
* 1.2 The Transformative Power of Organization: (H2)
* 1.2.1 Saving time and reducing stress. (H3)
* 1.2.2 Improving meal planning and reducing food waste. (H3)
II. Assessing Your Pantry:
* 2.1 Taking Inventory: (H2)
* 2.1.1 Removing all items. (H3)
* 2.1.2 Checking expiration dates. (H3)
* 2.1.3 Identifying duplicates or unwanted items. (H3)
* 2.2 Evaluating Your Space: (H2)
* 2.2.1 Measuring shelves and available height. (H3)
* 2.2.2 Identifying areas with limited access. (H3)
III. Choosing Your Organization System:
* 3.1 The Zoning Method: (H2)
* 3.1.1 Grouping similar items together. (H3)
* 3.1.2 Creating zones for baking, snacks, etc. (H3)
* 3.2 The Category Method: (H2)
* 3.2.1 Organizing by food type (grains, canned goods, etc.). (H3)
* 3.3 The FIFO (First In, First Out) Method: (H2)
* 3.3.1 Placing older items in front for easy access. (H3)
IV. Essential Tools and Containers:
* 4.1 Clear Containers: (H2)
* 4.1.1 Uniformity for a clean aesthetic. (H3)
* 4.1.2 Easy identification of contents. (H3)
* 4.2 Labels: (H2)
* 4.2.1 Creating clear and concise labels. (H3)
* 4.2.2 Using a label maker or handwritten labels. (H3)
* 4.3 Pull-out shelves and risers: (H2)
* 4.3.1 Maximizing vertical space. (H3)
V. Implementing Your System:
* 5.1 Cleaning Your Pantry: (H2)
* 5.2 Organizing by Zones/Categories: (H2)
* 5.3 Labeling Everything: (H2)
VI. Maintaining Your Organized Pantry:
* 6.1 Regular Purging: (H2)
* 6.2 The “One In, One Out” Rule: (H2)
VII. Conclusion
VIII. FAQs
Pantry Organization System: Transforming Chaos into Calm
1.1 The Chaos of a Cluttered Pantry:
Let’s be honest, a disorganized pantry can be a major source of frustration. It’s the endless search for that one specific spice, the mountains of forgotten food lurking in the back, and the sinking feeling that you’re wasting money on expired ingredients. Remember that feeling of dread when you open your pantry door only to be greeted by a chaotic jumble of food containers and mismatched bags? It’s not just aesthetically unappealing; it’s inefficient and downright stressful.
1.2 The Transformative Power of Organization:
But what if I told you that transforming your pantry from a chaotic mess into a beautifully organized space isn’t as daunting as it sounds? In fact, a well-organized pantry can save you significant time and reduce your stress levels dramatically. Imagine effortlessly finding what you need when you need it – no more frantic rummaging! Plus, with better visibility of your stock, you’ll be better equipped to plan meals and minimize food waste, saving you money in the long run. It’s like a mini-kitchen makeover that yields big rewards.

2.1 Taking Inventory:
The first step towards a perfectly organized pantry is to conduct a thorough inventory. This means emptying your entire pantry, removing everything from the shelves. It might seem like a big task, but trust me, it’s essential. This gives you a blank canvas to work with.
2.2 Evaluating Your Space:
Once your pantry is empty, take a good look at the space itself. Measure the shelves, noting the available height and width. Identify any areas that are difficult to reach—perhaps some awkward corners or high shelves that are nearly inaccessible. This assessment will help you determine the best organizational strategy and choose the right storage solutions.
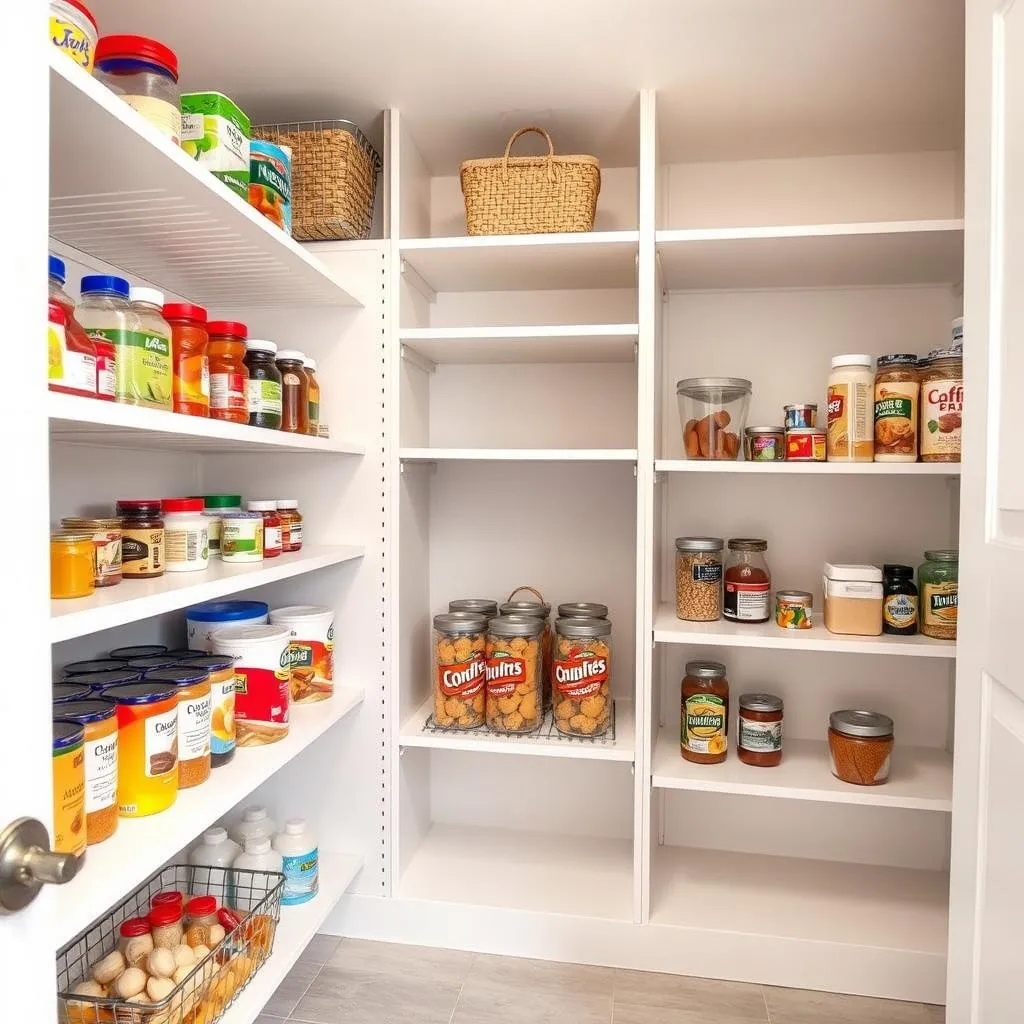
3.1 The Zoning Method:
One popular approach is the zoning method. This involves dividing your pantry into different zones, each dedicated to a specific category of food. For example, you might have a baking zone with all your flour, sugar, and baking powder neatly contained, a snack zone, and a canned goods zone. This makes locating items incredibly quick and efficient.
3.2 The Category Method:
Another method is to categorize items by food type. This approach might involve grouping all your grains together (rice, pasta, quinoa), all your canned goods together, and all your snacks together. This system is straightforward and easy to understand.
3.3 The FIFO (First In, First Out) Method:
Regardless of your chosen method, remember the FIFO principle – First In, First Out. Always place older items in front and newer items in the back to ensure that you use older items before they expire. Think of it as a rotating system to prevent food waste.
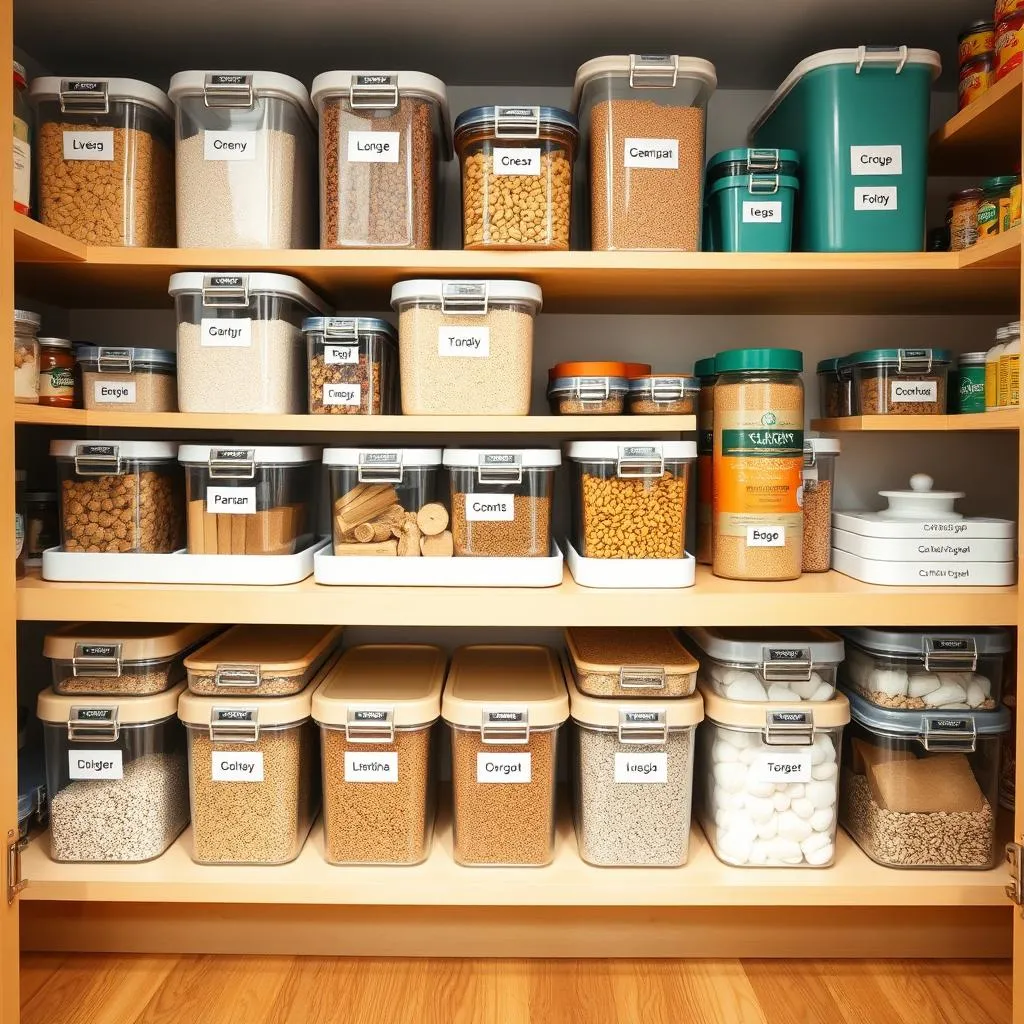
4.1 Clear Containers:
Now it’s time to think about containers. Clear, uniform containers are your best friend when it comes to pantry organization. They make it easy to see what’s inside, helping you avoid buying duplicates. Plus, they create a much cleaner and more aesthetically pleasing look, adding a touch of elegance to your pantry.
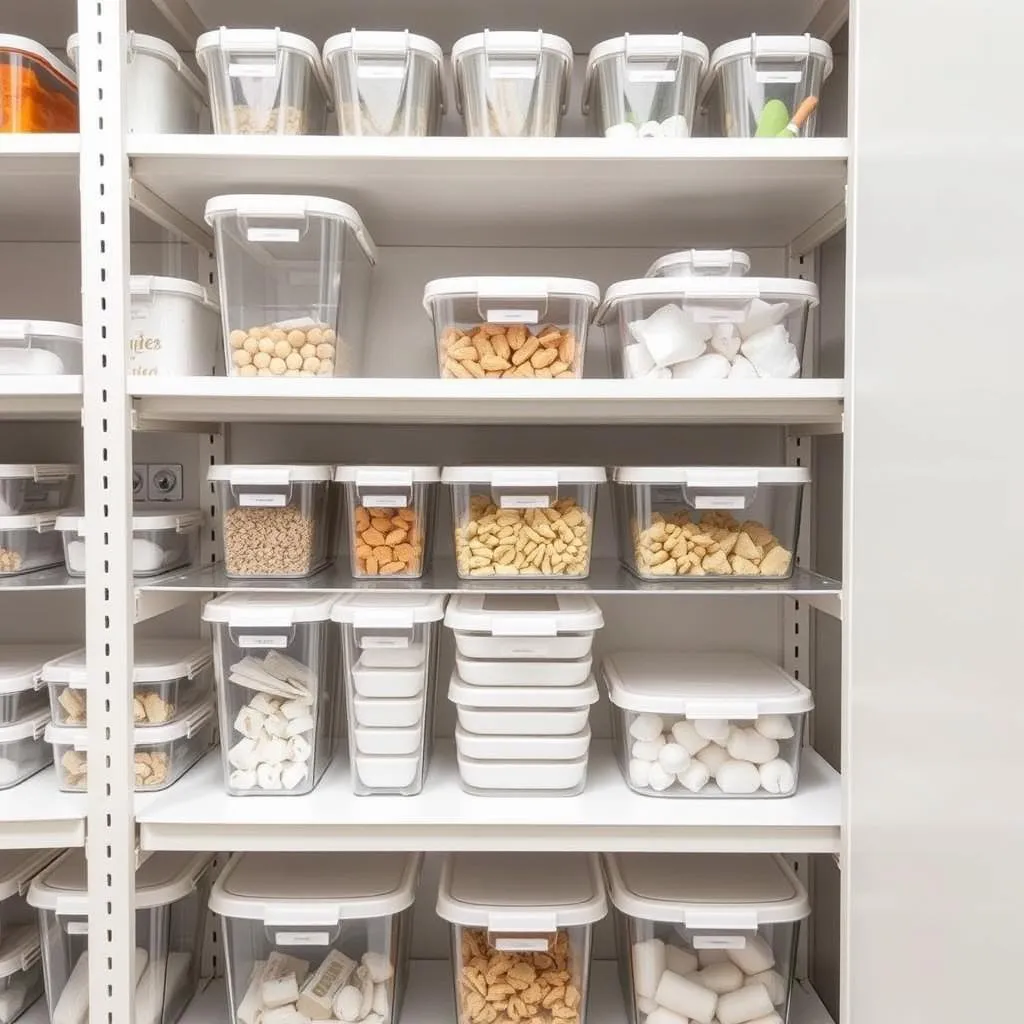
4.2 Labels:
Don’t underestimate the power of labeling! Clear, concise labels are crucial for maintaining order. Whether you prefer a label maker for a professional look or hand-written labels with a personal touch, make sure your labels are easy to read and accurately reflect the contents of each container.
4.3 Pull-out shelves and risers:
Consider using pull-out shelves and risers to maximize vertical space, especially if you have deep shelves or limited space. These ingenious tools bring items to the front, making everything easily accessible.
5.1 Cleaning Your Pantry:
Before you start organizing, give your pantry a good clean. Wipe down the shelves, remove any sticky spills or crumbs, and give it a thorough vacuuming or dusting. A clean pantry provides the perfect foundation for your organized system.
5.2 Organizing by Zones/Categories:
Now, it’s time to put your chosen system into action. Place your labeled containers on the shelves, grouping similar items together according to your preferred method (zoning or categories). Remember the FIFO principle to manage expiration dates effectively.
5.3 Labeling Everything:
Go back and double-check your labels to ensure everything is clearly identified. This seemingly small detail will save you countless minutes of searching in the long run.
6.1 Regular Purging:
Once your pantry is organized, don’t just let it fall into disarray. Schedule regular purges—perhaps once a month—to check expiration dates and remove any unwanted or expired items.
6.2 The “One In, One Out” Rule:
To maintain the order, consider adopting the “one in, one out” rule. For every new item you bring into your pantry, remove an older item of the same kind. This will prevent your pantry from becoming cluttered again.
VII. Conclusion:
Creating a well-organized pantry is an investment in your time, sanity, and your budget. By following these steps, you can transform your pantry from a source of frustration into a space that’s both functional and aesthetically pleasing. Remember, consistency is key—regular maintenance will help keep your pantry clutter-free and efficiently organized for years to come. It might seem like a big undertaking at first, but the rewards far outweigh the effort. It’s a rewarding accomplishment!
VIII. FAQs
-
What type of containers are best for pantry organization? Clear, airtight containers are ideal. They allow you to see the contents easily and keep food fresh for longer.
-
How often should I purge my pantry? Aim for a monthly purge to check expiration dates and remove unwanted items.
-
What if my pantry is very small? Even small pantries can be organized effectively. Utilize vertical space with shelves and risers, and focus on utilizing clear, space-saving containers.
-
What are some creative labeling ideas? You can use label makers, handwritten labels on chalkboard stickers, or even masking tape. The most important thing is that the labels are clear and legible.
-
How do I handle items without clear packaging? Transfer items into clear containers or use label makers to clearly label the existing packaging.